Exchange a Unit (Mobile App)

Use the mobile app to swap units on an open agreement.

How to Exchange a Unit on Mobile

Quick Steps Full Walkthrough

Quick Steps

1

Access an agreement from the Dashboard or tap Exchange, then scan the unit or search for the agreement.

2

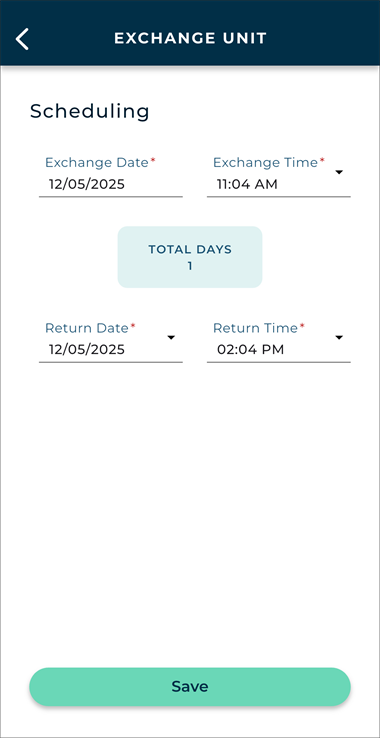
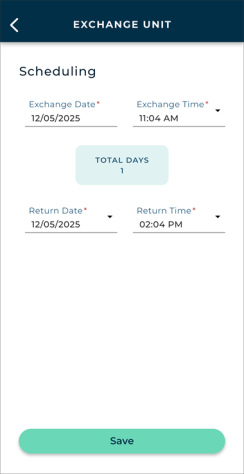
Update scheduling details for the unit being exchanged off the agreement, and the adjusted Return Date / Time for the unit you plan to assign as a replacement. Tap Save.

3

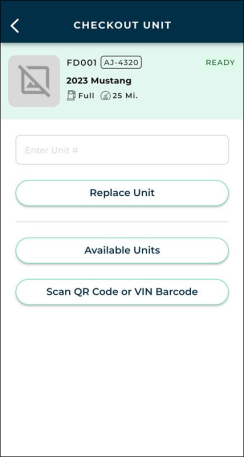
Assign a replacement unit.

4

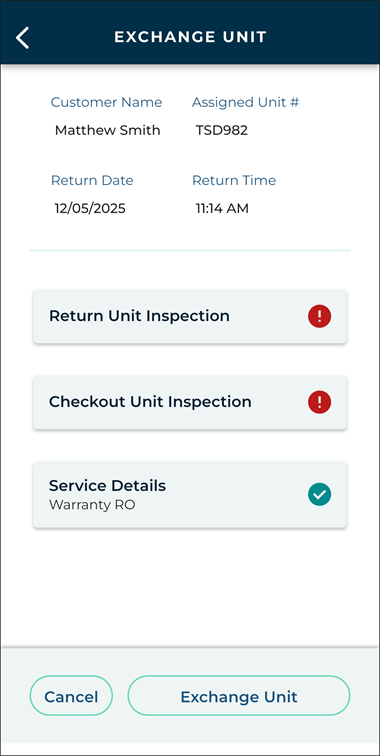
Complete exchange inspections in the sections that apply: Return Unit Inspection (for the returning unit), Checkout Unit Inspection (for the new unit) and service details.

5

Tap Exchange Unit.

Full Walkthrough

1. Find the Agreement

You can view an agreement from several places in the app. Choose whichever is most convenient for you.

ClosedOption 1: Scan the Returning Unit / Search.

  1. Tap Exchange.
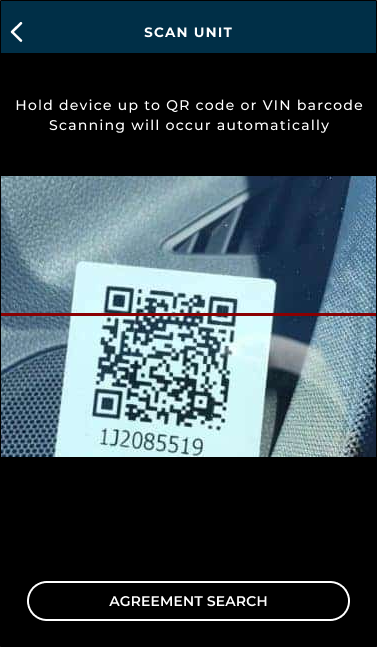
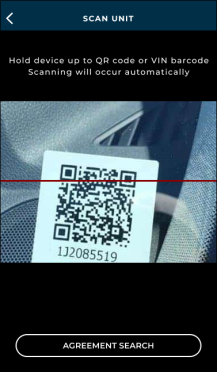
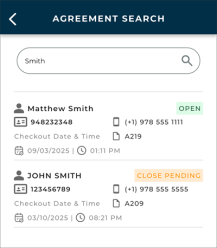
  2. Your camera opens automatically. You can scan the returning unit's QR Code or VIN barcode, or tap Search to exit the scanner and manually look up the agreement by customer name, Unit Number, Plate Number, Tag Number, Agreement Number, or RO Number.
    • Scan a unit

      Search for an agreement

ClosedOption 2: View an agreement.

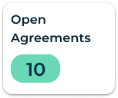
  1. Tap the Open Agreements card on your Dashboard and select the agreement, or Tap View from the main menu and look up the agreement. (Use the search feature, as needed, to narrow results by Unit Number, Plate Number, Tag Number, Agreement Number, or RO Number.)
  2. Search for an agreement

  3. Select the agreement and tap EXCHANGE from the available actions.

2. Update Scheduling

Update the Exchange Time, if needed, for today's Exchange Date, and adjust the Return Date and Time. The Total Days, the length of the unit's usage on the agreement, is shown.

When you're finished, tap Save.

3. Assign a New Unit

Choose how you want to assign a new unit.

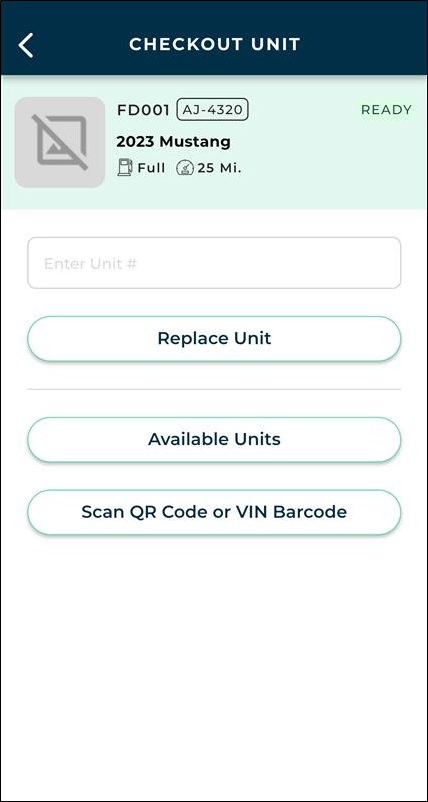
ClosedOption 1: Enter the exact Unit Number.

Type the full, exact Unit # and tap Exchange Unit. (After a unit is assigned, this button becomes Replace Unit).

Quick Returns: If you enter a unit that is In Use on another agreement, the app displays the option to perform a quick return to free up the unit. After the agreement is closed or close pended, you are returned to the current agreement with the unit now assigned.

ClosedOption 2: Browse a list of available units.
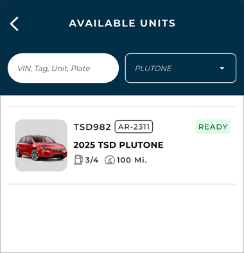
Tap Available Units. The list is available for searching by VIN, Unit Tag, Unit Number, or Plate, and filtering by Model.

ClosedOption 3: Scan a unit.

Tap Scan QR Code or VIN Barcode.

4. Complete Exchange Inspections and Service Details

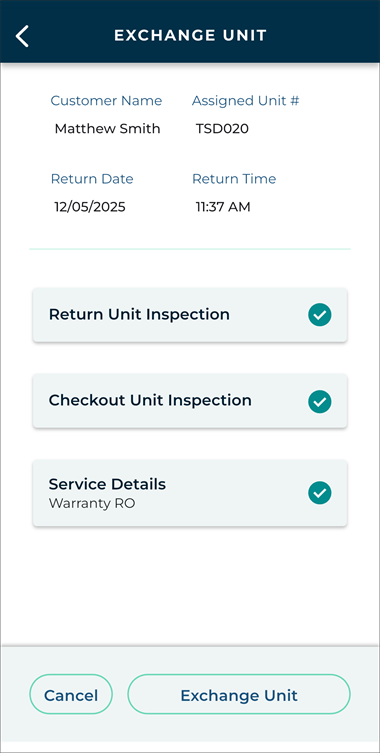
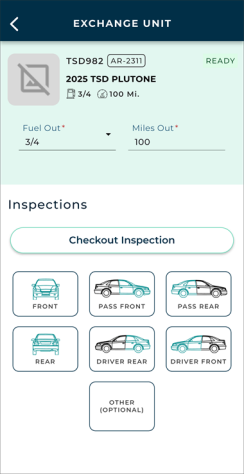
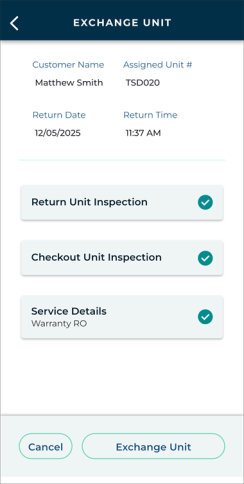
The Exchange Unit screen shows key details, such as the customer name, Unit Number of the newly-assigned unit, and Return Date / Time at the top, along with several sections.


Hover to view the full-sized image.

A section with required information still needing completion is marked (). After you fill in all required fields in a section, it is marked as completed ().

Return Unit InspectionClosed

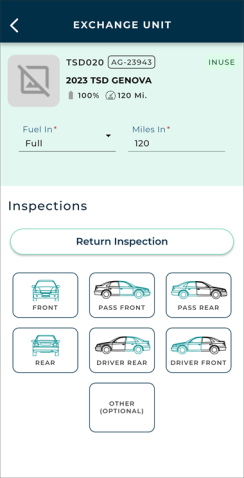
The Return Unit Inspection section of the exchange is where you can record the returning unit's Fuel In / Battery In and Miles In, and tap Return Inspection to take photos and mark damage, as needed, for all listed zones of the returning vehicle.

When this section is complete, use the Back arrow () to return to the Exchange Unit screen and complete the next section.
ClosedHow to perform an inspection:

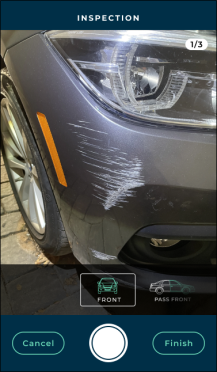
During this inspection, you'll take up to three (3) photos and mark damage, as needed, for all listed zones of the vehicle: Front, Passenger Front, Passenger Rear, Rear, Driver Rear, Driver Front, and Other (i.e., the roof).

  1. Start your walkaround from the front of the vehicle.
  2. Aim your device's camera at the vehicle zone, and tap the Shutter button to take a photo. (If you need to retake the photo, tap Cancel and take it again.)
  3. Tap the Shutter button to take a photo.

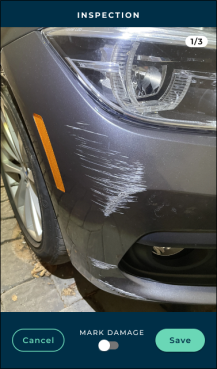
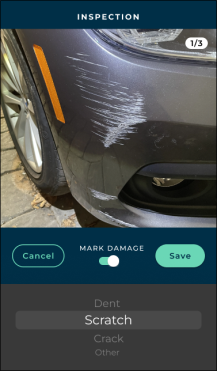
  4. To note damage in the photo, tap MARK DAMAGE , and select the type of damage (e.g., dent, scratch, crack, or other).
  5. Mark damage, if needed.

  6. Tap Save. Both the photo and the damage entry, if noted, are saved.
  7. Repeat as needed, taking up to three (3) photos, total. (The number of photos saved for the zone is displayed in the upper right corner.)
  8. Tap or scroll to the next zone (e.g., Pass Front), and repeat the above for all listed zones, as required. (If inspections are required at your location, you must take at least one photo of each zone.)
  9. When finished inspecting the vehicle, tap Finish.

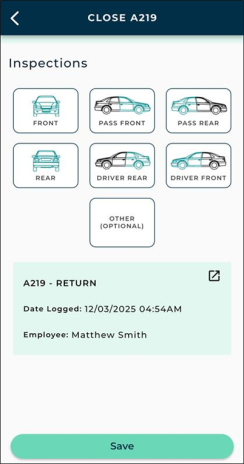
When you've finished the inspection and returned to the agreement, a summary of the inspection is shown, including Date Logged and Employee who performed the inspection.

Inspection summary on the agreement.

Before you move on with this agreement, you can tap the Details icon () within the summary to review this inspection for each zone. When doing so, you can do the following:
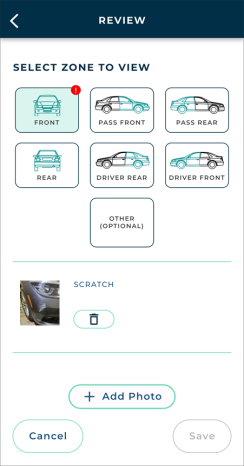
  • Tap a zone to view or delete photos. (Tap a thumbnail to view the full size.)
  • Tap + Add Photo to add a photo (up to three (3), total), and note additional damage, as needed.

If you make any changes when reviewing an inspection, tap Save.

Review inspection.

Checkout Unit InspectionClosed

The Checkout Unit Inspection section of the exchange is where you can record the newly-assigned unit's Fuel Out / Battery Out and Miles Out, and tap Checkout Inspection to take photos and mark damage, as needed, for all listed zones of the outgoing vehicle.

ClosedHow to perform an inspection:

During this inspection, you'll take up to three (3) photos and mark damage, as needed, for all listed zones of the vehicle: Front, Passenger Front, Passenger Rear, Rear, Driver Rear, Driver Front, and Other (i.e., the roof).

  1. Start your walkaround from the front of the vehicle.
  2. Aim your device's camera at the vehicle zone, and tap the Shutter button to take a photo. (If you need to retake the photo, tap Cancel and take it again.)
  3. Tap the Shutter button to take a photo.

  4. To note damage in the photo, tap MARK DAMAGE , and select the type of damage (e.g., dent, scratch, crack, or other).
  5. Mark damage, if needed.

  6. Tap Save. Both the photo and the damage entry, if noted, are saved.
  7. Repeat as needed, taking up to three (3) photos, total. (The number of photos saved for the zone is displayed in the upper right corner.)
  8. Tap or scroll to the next zone (e.g., Pass Front), and repeat the above for all listed zones, as required. (If inspections are required at your location, you must take at least one photo of each zone.)
  9. When finished inspecting the vehicle, tap Finish.

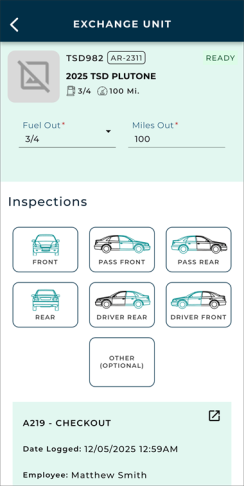
When you've finished the inspection and returned to the agreement, a summary of the inspection is shown, including Date Logged and Employee who performed the inspection.

Inspection summary on the agreement.

Before you move on with this agreement, you can tap the Details icon () within the summary to review this inspection for each zone.

When reviewing details, you can do the following:

  • View or delete photos. Tap a zone to view or delete photos. (Tap a thumbnail to view the full size.)
  • Add additional photos (+ Add Photo), up to three (3), total, and note additional damage, as needed.

If you make any changes, tap Save.

Review inspection.

Service DetailsClosed

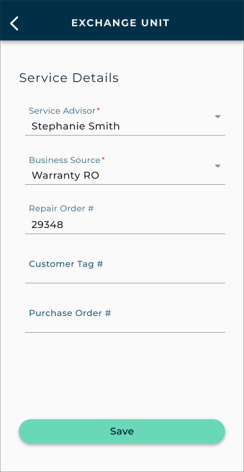
This section consists of the customer's service details, including Service Advisor, Business Source, Repair Order #, Customer Tag #, and Purchase Order #.

When you're finished with this section, tap Save.

5. Complete the Exchange

Once all sections are completed, tap Exchange Unit to save the unit exchange on the agreement.

The app displays a short confirmation and you are returned to your 'Home' screen.